

Knowledge Base
Categories
OJS 3.3 Tutorial
Unlike OJS 3.4, DOI registration in OJS 3.3 requires two separate plugins: the DOI Plugin and the Crossref XML Export Plugin.
Step 1 — Enable the DOI Plugin
- Ask your OJS administrator to install the DOI Plugin, if not already installed, and to add the DOI prefix assigned by Crossref (format 10.xxxx, e.g., 10.1234).
- To check whether the DOI Plugin is already set up:
- Go to Settings > Website.
- Select the Plugins tab.
- Search under Public Identifier Plugins and find DOI.
- Click the checkbox on the right side of the plugin description to enable it.
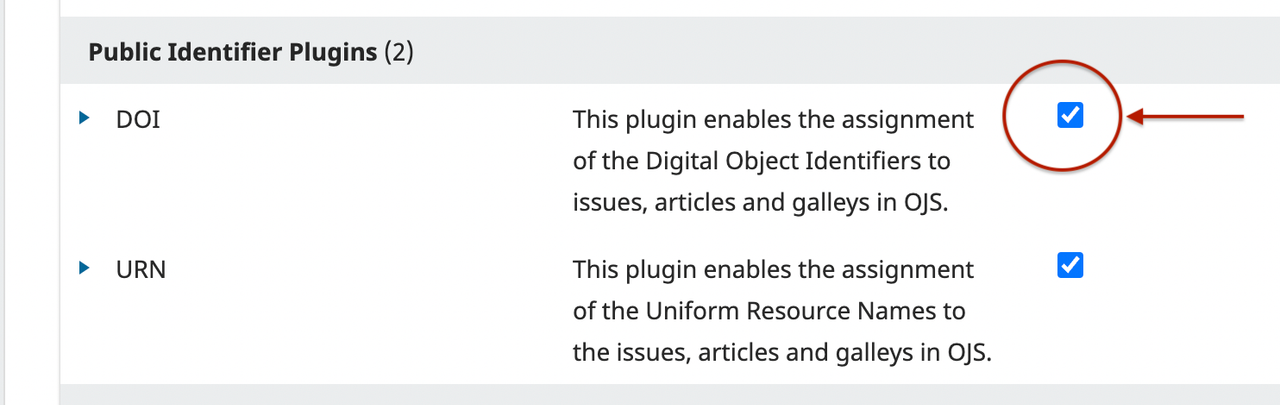 Image source: https://www.crossref.org/documentation/register-maintain-records/ojs-plugin/ojs-3.3/
Step 2 — Set Up the Crossref XML Export Plugin
Make sure you are using OJS version 3 or higher for the plugin to work properly.
- Go to the Tools menu.
- Select the Import/Export tab.
- Click Crossref XML Export Plugin.
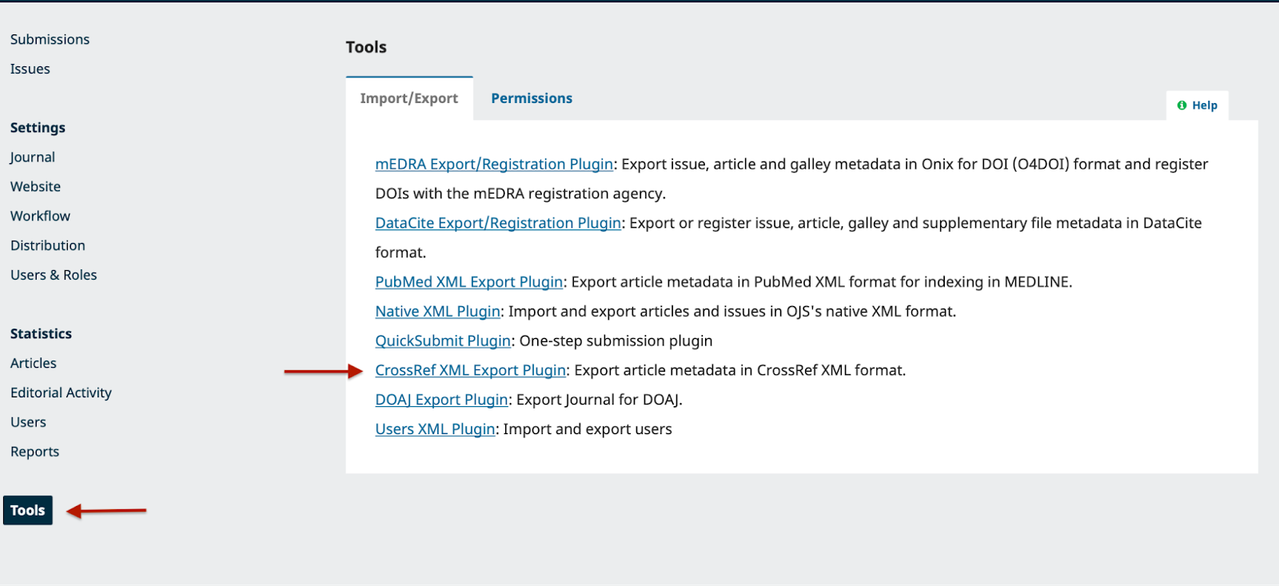 Image source: https://www.crossref.org/documentation/register-maintain-records/ojs-plugin/ojs-3.3/
There are three ways to deposit content with Crossref:
- Automatic registration via the OJS plugin.
- Manual registration through the plugin interface.
- Manual registration by uploading/exporting XML.
To enable automatic deposits, check the box at the bottom of the DOI Plugin settings page. Image source: https://www.crossref.org/documentation/register-maintain-records/ojs-plugin/ojs-3.3/
Step 3 — Fill in the Plugin Configuration
Complete the following fields on the plugin settings page: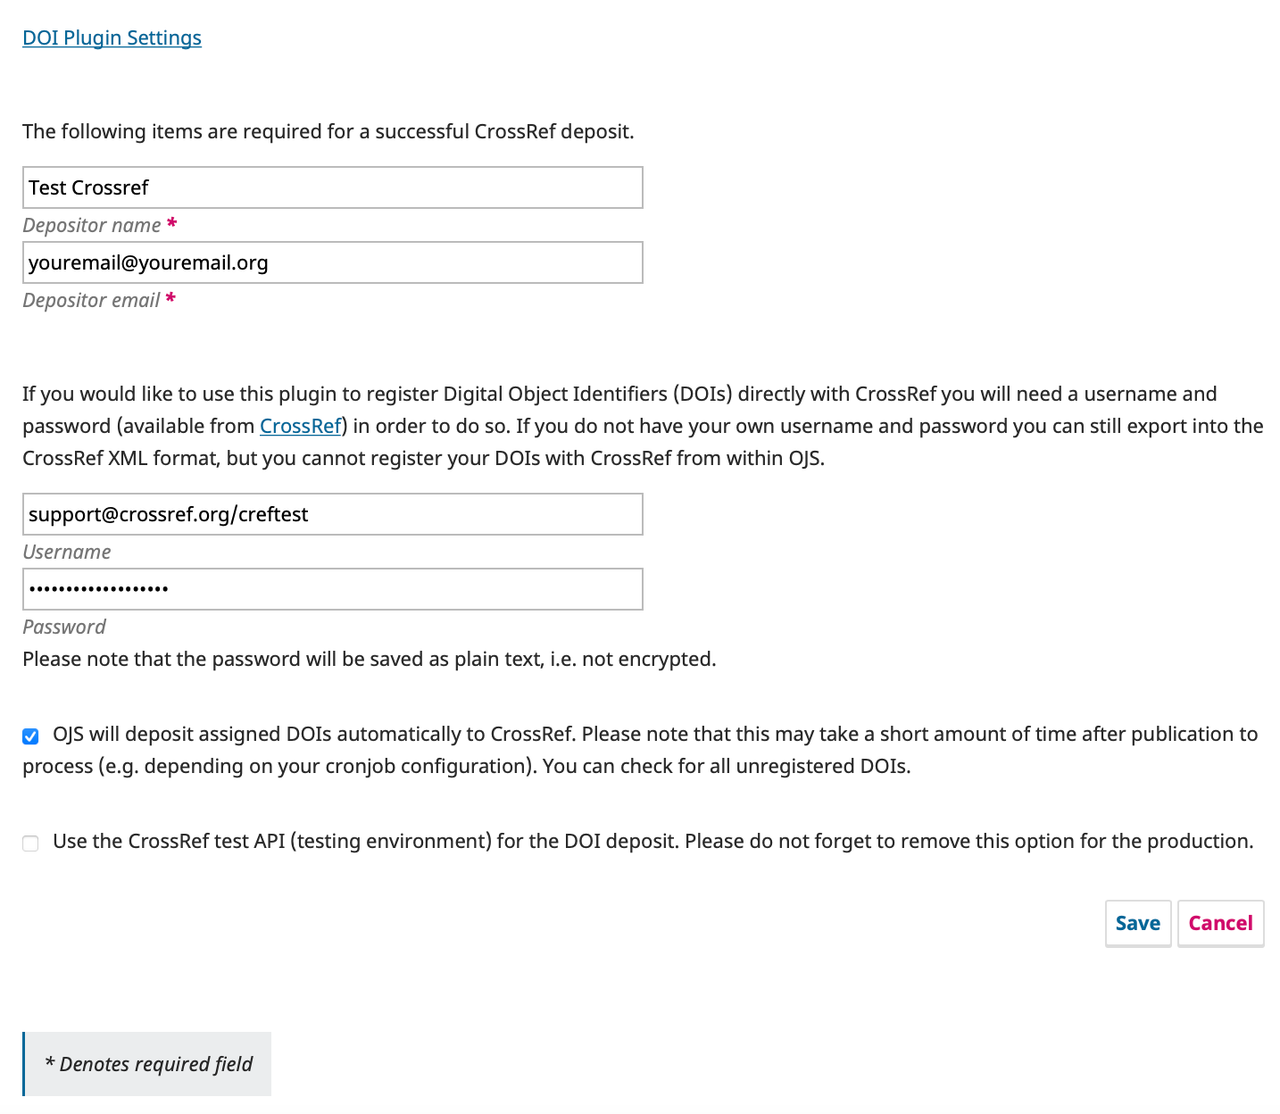 Image source: https://www.crossref.org/documentation/register-maintain-records/ojs-plugin/ojs-3.3/
- Depositor name — the name of the organization registering the DOIs (not authenticated by Crossref).
- Depositor email — the email of the person responsible for registering content with Crossref (also not authenticated).
- Username — the username element of your Crossref depositor credentials, used for authentication. May be a set of letters (role credentials) or an email address (user credentials).
- Password — the password associated with your Crossref depositor credentials.
Related Articles
PT Pubmedia Digital Sains
Jl. Sidorejo, Gg. Nakula No. C12 Ngestiharjo, Kasihan, Bantul, D.I Yogyakarta 55182 [email protected] +62 851-6865-2024Partners