

Knowledge Base
Find guides, tutorials, and answers to questions about our services.
Categories
OJS 3.4 Tutorial
Published on
10 Jul 2026
342 views
In OJS 3.4, the entire process is handled through a single main plugin, the Crossref Manager Plugin, with further configuration under Distribution > DOI.
Step 1 — Enable the Crossref Manager Plugin
- Log in as Journal Manager
- Go to Settings, then click Website > Plugins.
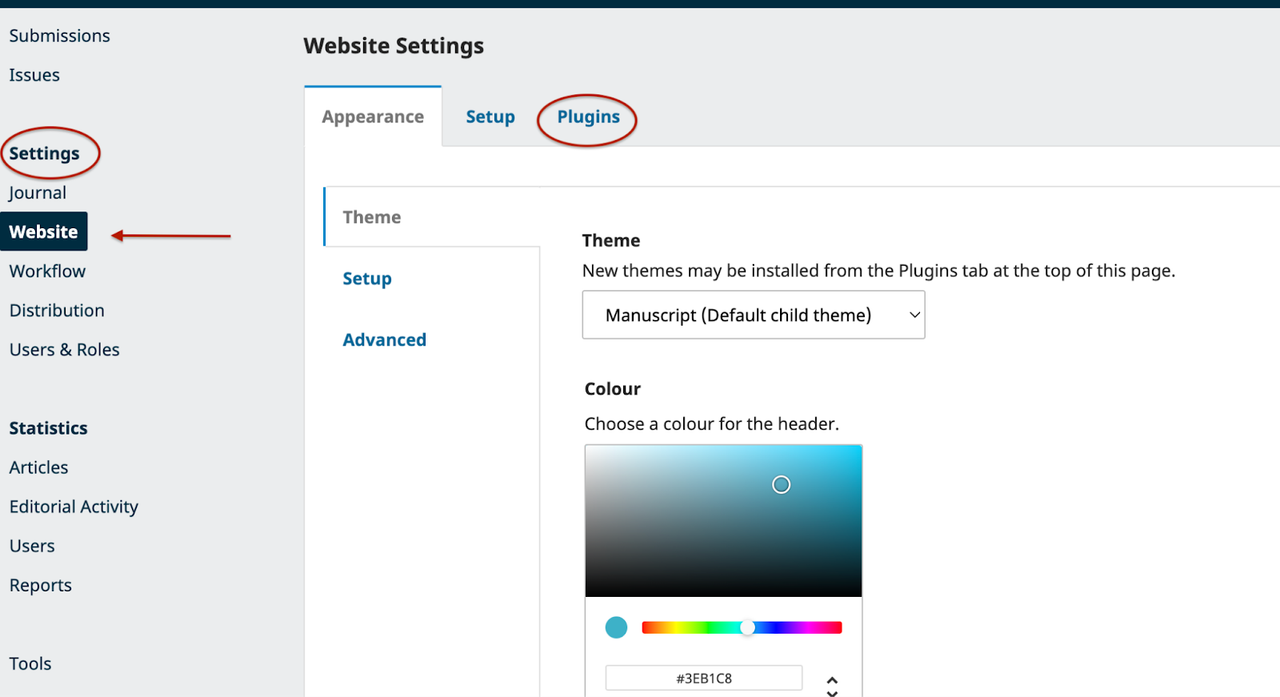 Image source: https://www.crossref.org/documentation/register-maintain-records/ojs-plugin/ojs-3.3/
 - Under Installed Plugins, scroll down to the Generic Plugins section.
- Find Crossref Manager Plugin and click the checkbox next to it to enable the plugin.
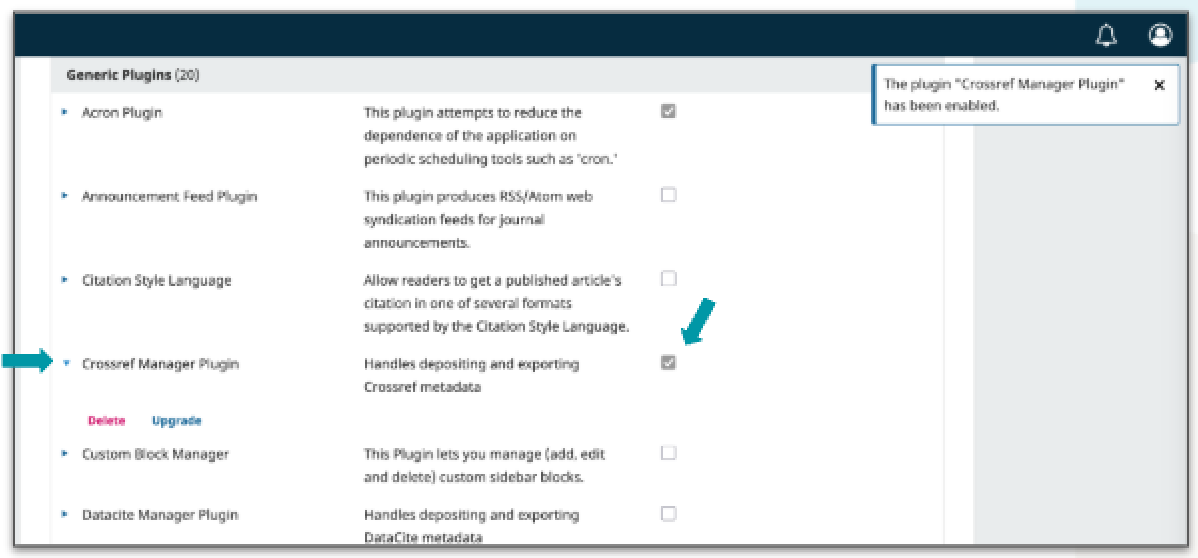 Image source: https://www.crossref.org/documentation/register-maintain-records/ojs-plugin/ojs-3.4/
Step 2 — Set Up Automatic DOI Registration
- Go to the Distribution menu, then select the DOI tab.
- Click the Setup option.
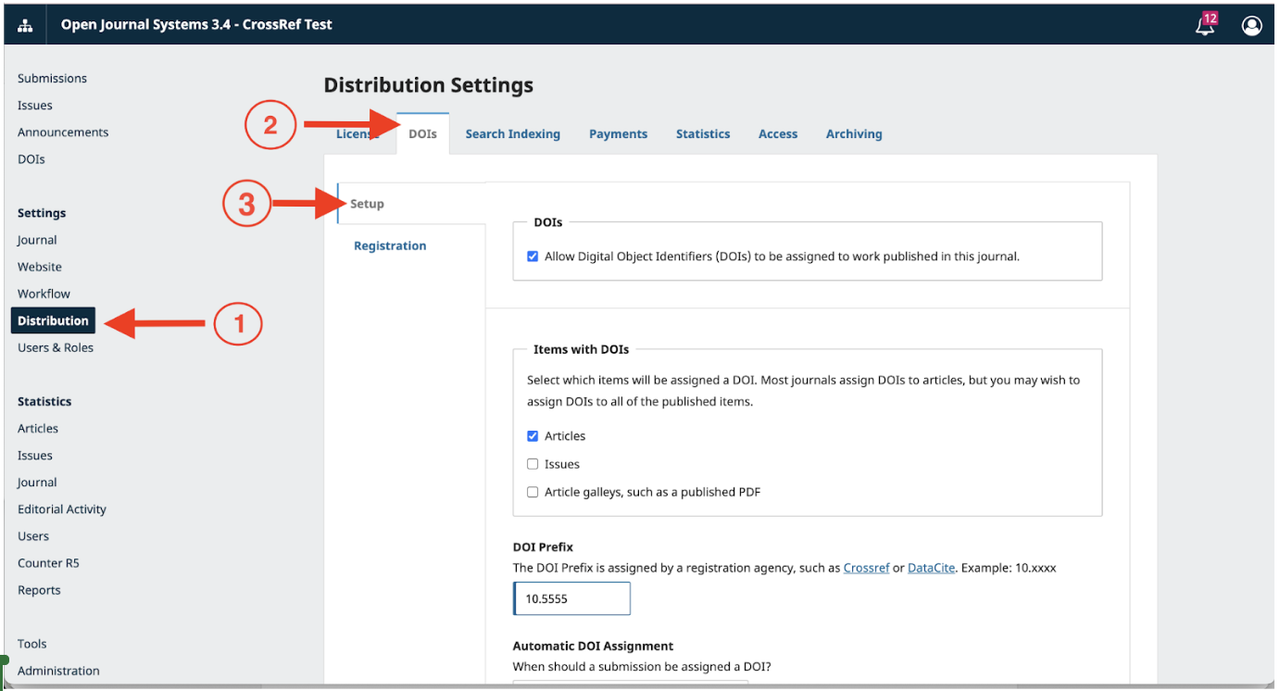 Image source: https://www.crossref.org/documentation/register-maintain-records/ojs-plugin/ojs-3.4/
 - Check the box to allow DOIs to be assigned to your published works.
- Check the box to determine which items will receive a DOI (e.g., articles and/or issues).
- Enter your Crossref-assigned DOI prefix. It always starts with 10. followed by a number, e.g., 10.5555.
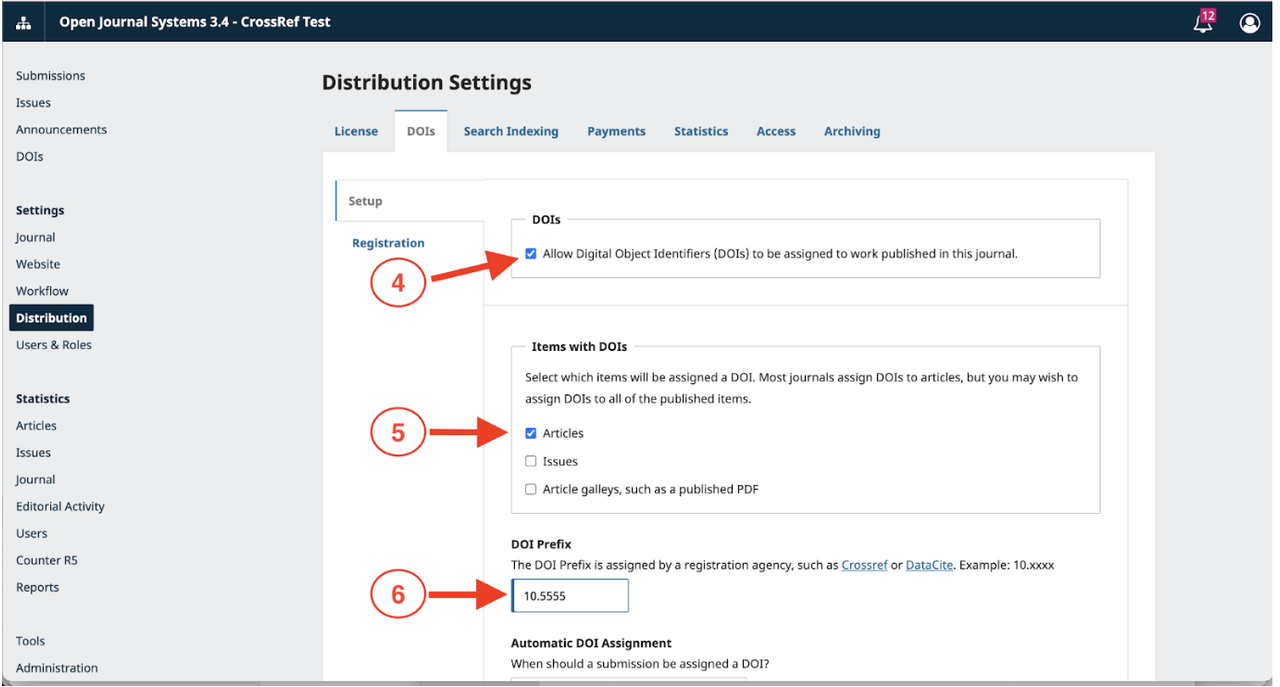 Image source: https://www.crossref.org/documentation/register-maintain-records/ojs-plugin/ojs-3.4/
 - Select the preferred stage for automatic DOI assignment — either when an article reaches the copyediting stage, or upon publication.
- Select your preferred DOI suffix generation method: Default (system-generated), None (manual entry), or Custom pattern.
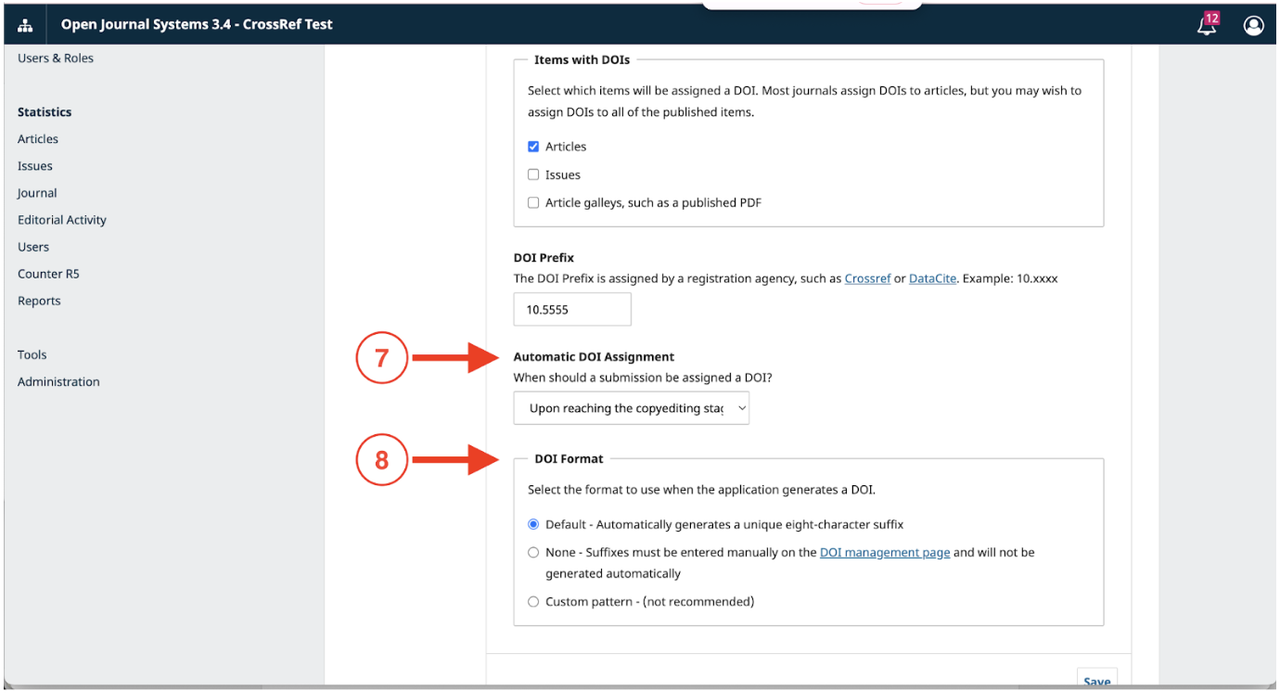 Image source: https://www.crossref.org/documentation/register-maintain-records/ojs-plugin/ojs-3.4/
 - If you select Custom Pattern, enter the following for the Custom DOI Suffix Pattern.
- Submissions: %j.v%vi%i.%a
- Article Galleys: %j.v%vi%i.%a.g%g
- Issues: %j.v%vi%i
Step 3 — Configure the Registration Tab
- Switch to the Registration tab (still under Distribution > DOI).
- Select Crossref as your Registration Agency from the dropdown. If "Crossref" does not appear, go back to Website > Plugins > Plugin Gallery and enable the Crossref Manager Plugin first.
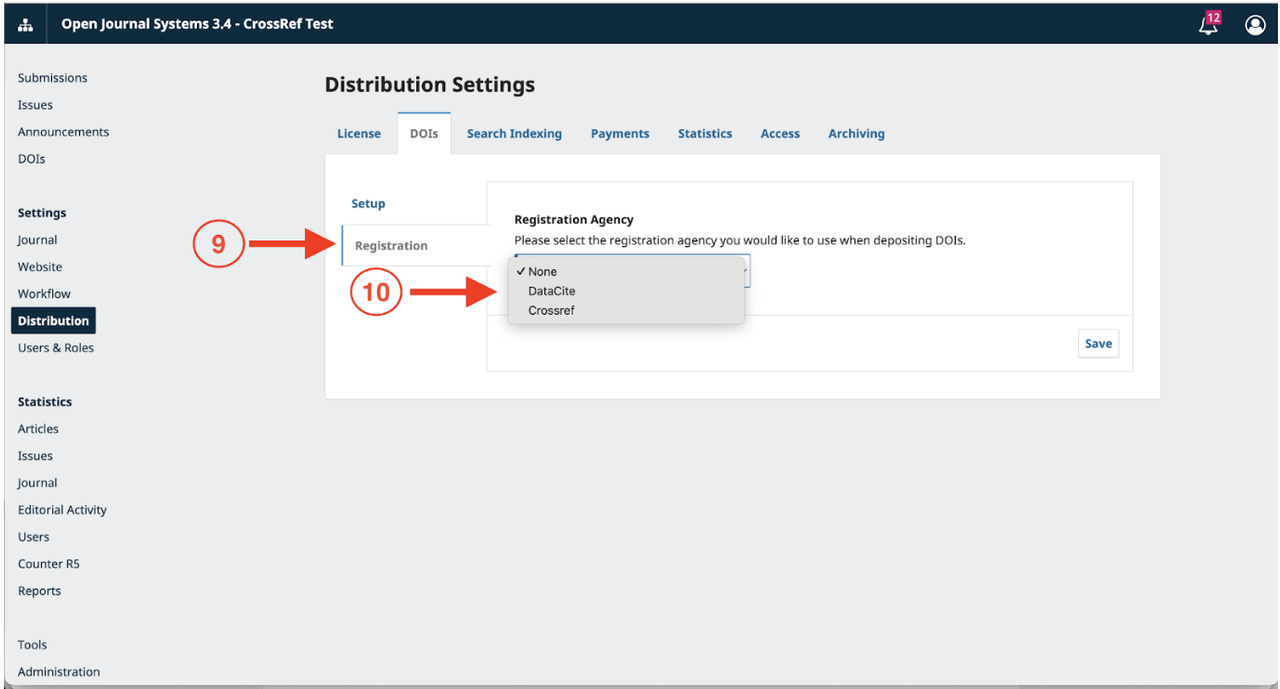 Image source: https://www.crossref.org/documentation/register-maintain-records/ojs-plugin/ojs-3.4/
 - Check the Automatic Deposit box to enable automatic DOI deposits from your OJS instance.
- Enter your organization/journal name in the Depositor Name field.
- Enter the email address that should receive deposit notifications in the Depositor Email field.
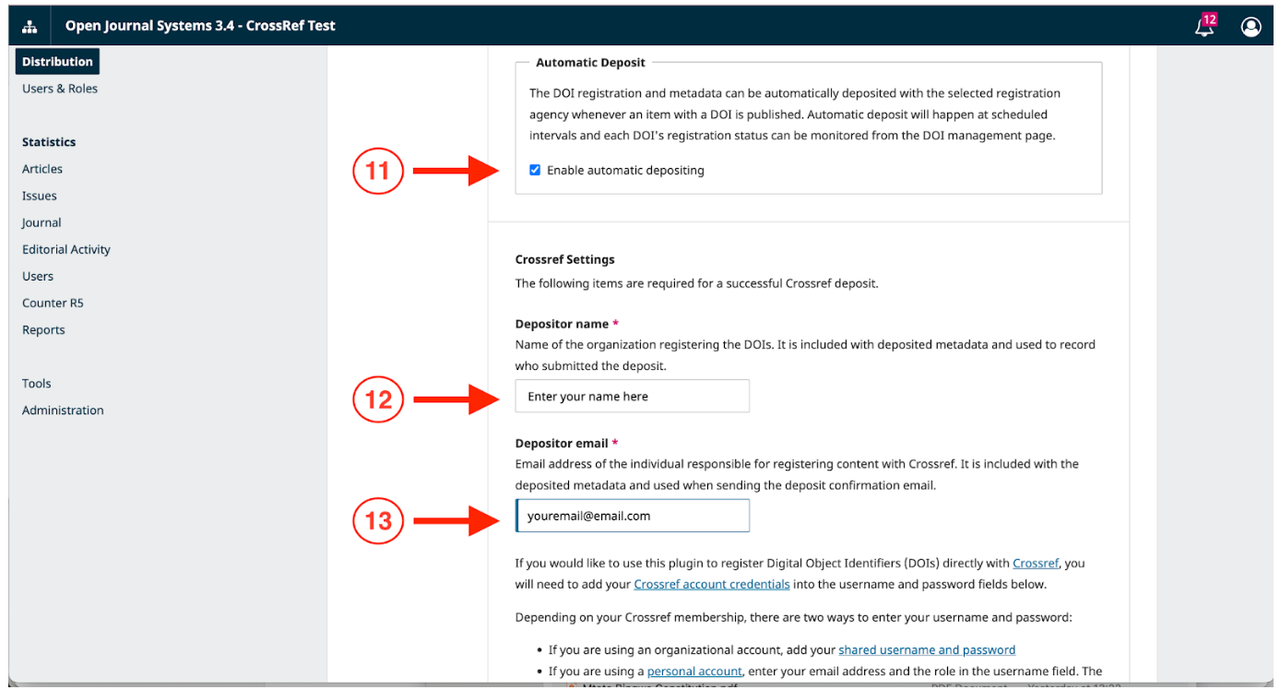
Image source: https://www.crossref.org/documentation/register-maintain-records/ojs-plugin/ojs-3.4/ - Enter your assigned Crossref Username.
- Enter your Crossref account Password.
- Important: leave the test checkbox unchecked unless you are intentionally running a test submission.
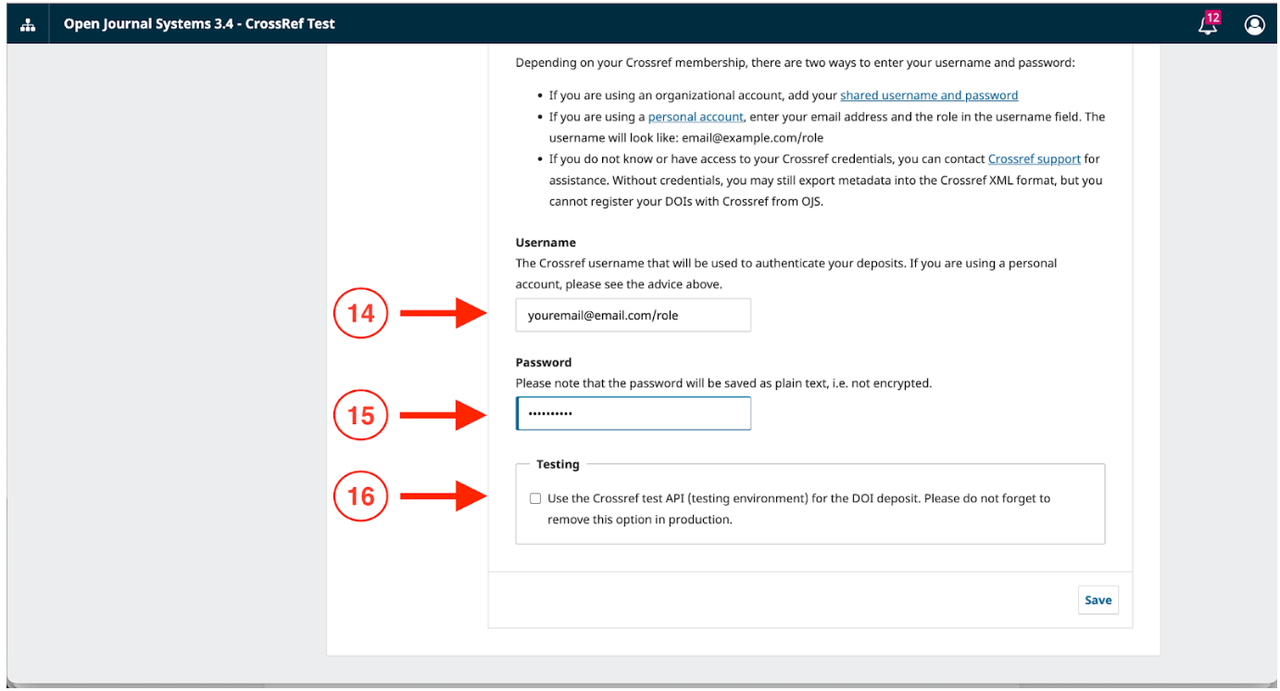
Image source: https://www.crossref.org/documentation/register-maintain-records/ojs-plugin/ojs-3.4/
Related Articles
PT Pubmedia Digital Sains
Jl. Sidorejo, Gg. Nakula No. C12 Ngestiharjo, Kasihan, Bantul, D.I Yogyakarta 55182 [email protected] +62 851-6865-2024Partners


© 2026
PT Pubmedia Digital Sains
. All rights reserved.